Anatomy of a Character
- Posted by Francesco
- 7 Min. read
- 0 Comments
A couple of weeks ago we introduced our fifth character in Guntastic, so I thought it might be a good time to talk about our character creation workflow, from the concept stage to the actual implementation in Unreal Engine 4.

Introducing a new character in #Guntastic: say hello to the Demonic Koala! #screenshotsaturday #indiedev #gamedev #pixelart #ue4
PS: maybe we've been playing a bit too much Dragon Ball FighterZ lately... pic.twitter.com/mHuvTnQvtI— Ludicrous Games (@weareludicrous) June 30, 2018
In The Beginning…
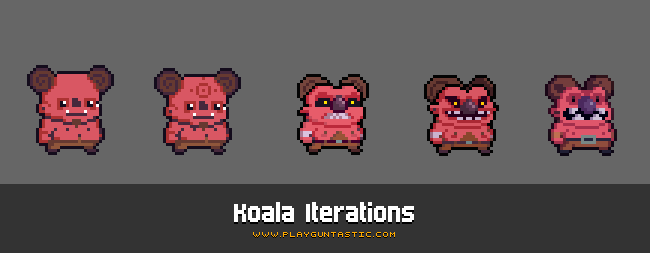
The process begins with our artist Simone doing some quick sketches of different characters, from which we usually pick the one we like the most.

He then iterates on the design until we have something we like. Otherwise we drop a tear, throw everything away and start over.

Once the character design is final, he then proceeds to create all the required animations. It’s important for the design to be as refined as possible at this stage: altering it afterwards requires massive time as it involves editing all the animations frames one by one (a character currently has 162 unique animation frames – and counting!).
Although I tried to make him do the jump to a pixel-art drawing software (such as Pro Motion NG or Pyxel Edit), he stubbornly continued to use Photoshop for all the editing. This required some technical setup to allow for quick iteration times: each animation frame is on a separate layer, which is linked to a keyframe in the timeline for easy previewing. Each PSD usually contains multiple characters so that it’s easy to use previously created characters as blueprints for a new one.

From Photoshop To UE4
Exporting all the frames by hand would be madness, so we have a custom Photoshop script that automates the export process and generates a single PNG file out of each animation frame. Automating error-prone and repetitive tasks is invaluable for the overall workflow, especially for small teams with no fancy QA department. 😃 Our export script also helps us maintaining a strong nomenclature, which is invaluable to avoid the risk of going insane tracking errors, duplicated sprites, etc.
We then use Texture Packer to compress all the frames in a single texture atlas. If you do any 2D game development and don’t know about Texture Packer, you really need to check it out: it’s a nifty utility that packs multiple sprites into a single file (A.K.A. atlas, or spritesheet). This not only helps lowering texture memory usage, but also keeps the assets tidily organized - which soon becomes a necessity when you have to deal with large amounts of sprites. Texture Packer also works from the command line, so this step can be automated as well. At the moment we have a single atlas per-character.

The next step is (re)importing the atlas into the engine. We started out using Paper2D (that, for the uninitiated, is the 2D framework available by default in Unreal Engine 4), but slowly transitioned to a custom solution over time. This allowed us to have far more control over both the import process and the rendering of sprites and flipbooks (right now we use Paper2D only for editing and rendering tilemaps).
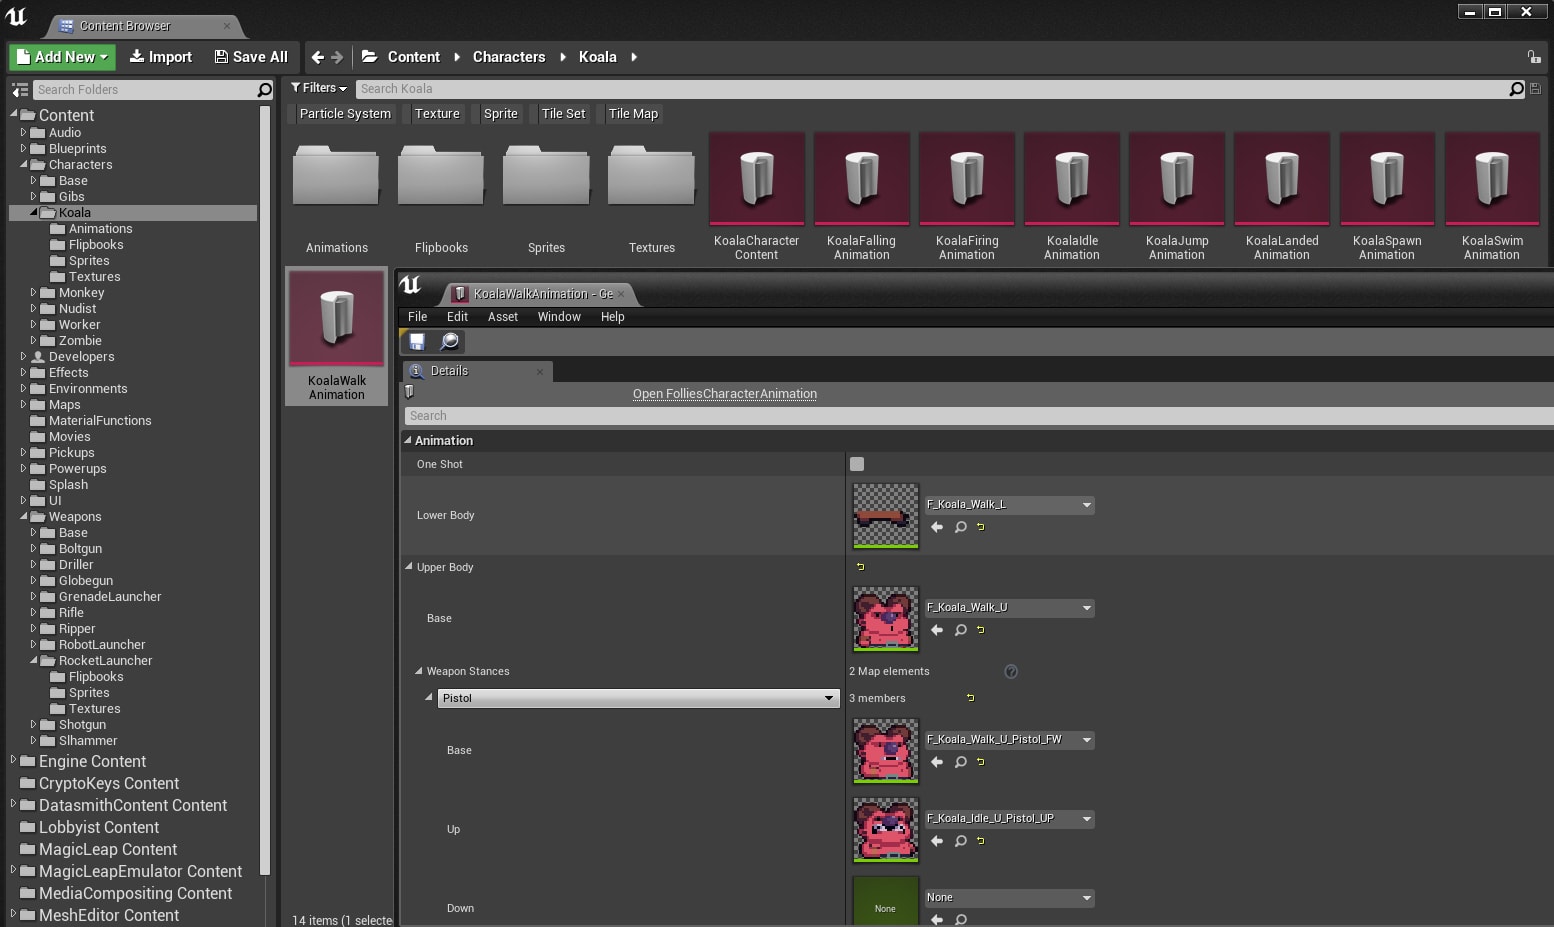
Once the atlas is imported we end up with multiple folders containing the sprites and flipbooks ready to use. To keep the amount of manual editing to a minimum, the system is also fed with spreadsheets containing useful defaults that are automatically applied to the sprites and flipbooks (such as frame rate, etc.). Additional animation assets are also generated in this step, which are used by our animation system to actually play the animations – more on this later.

Character Setup
Before digging into the actual animation system, lets briefly talk about how our characters are setup. In Guntastic a player can run, jump, shoot, fall, etc. – all at the same time. What’s more, a player can also aim at different direction while performing any of the aforementioned movements. We also have different weapon types, such as pistols and rifles, that require different character stances. Moreover, some animations such as jump, land and firing are one-shots rather than loops.
While prototyping the game, we soon found out that having full body animations for every permutation of the different actions a player can perform would soon make the animation count skyrocket, out of reach for the hands of only two developers. After some tinkering we ended up splitting the character into two different sprites: one for the lower body (legs, feet), and one for the upper body (torso, head, arms). This is similar to what’s usually done for 3D characters and allowed us to seamlessly play multiple animations on different parts of the body at the same time: for example we can have a walk animation playing on the legs, while a firing animation is playing on the torso.

The Animation System
Our animation system is implemented in C++ in our custom Character class and works by using the descriptor assets that were generated during the import process. These hold references to different flipbooks, each representing a different movement state (i.e. idle, walking, etc.), a different weapon stance (i.e. pistol, rifle, etc.) or a different aim offset (i.e. forward, up, down). The system then sorts out which flipbook to use on the lower and upper body sprites based on the current character state.

We also apply some modifiers to the animations: for example, the walk cycle is played faster or slower based on the current movement speed of the character. The whole system was kept intentionally simple (~150 lines of code) by enforcing constraints on the animations, which also make authoring them simpler. For example, all animations runs at framerates that are whole divisor of 24 FPS (i.e. 12, 6, etc.) to easily sync them.
Wish List
While the whole system works quite well, there’s still large room for improvements (as it’s always the case in game development!). Something I would have liked to have the time to work on was a UE4 editor extension that would import the animation frames directly from the PSD files. The extension would then take care of packaging the frames into texture atlases automatically, thus eliminating the need for external utilities and scripts.
Something I also would have loved to implement was a visual, state-machine-based animation system for flipbooks – similar to what Unreal Engine 4 provides out-of-the-box for skeletal meshes. While presumably less performant than the current hard-coded C++ solution (but then again, performances are rarely an issue in modern 2D games!) it would have helped tremendously during the prototyping phase. Maybe for the next game! 😉